Beit Yeshua
Israel Trip
21 October 2011
Day 10
Home
DAY 1
12 October 2011
DAY 2
13 October 2011
DAY 3
14 October 2011
DAY4
15 October 2011
DAY 5
16 October 2011
DAY 6
17 October 2011
DAY 7
18 October 2011
DAY 8
19 October 2011
DAY 9
20 October 2011
DAY 10
21 October 2011
DAY 11
22 October 2011
DAY 12
23 October 2011
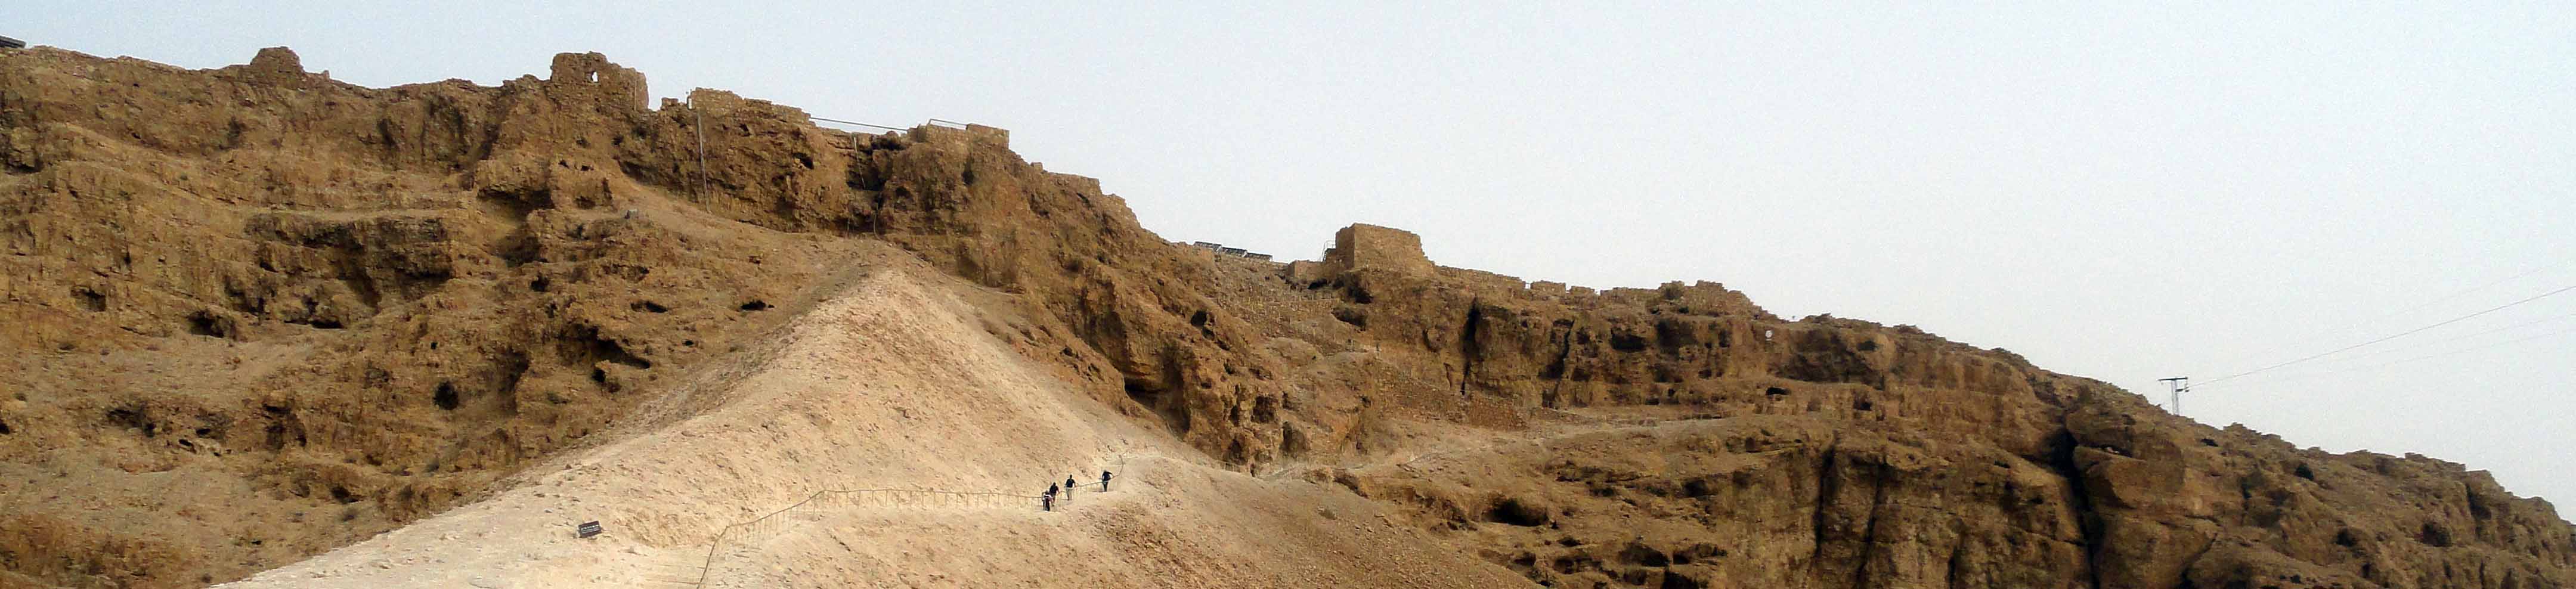
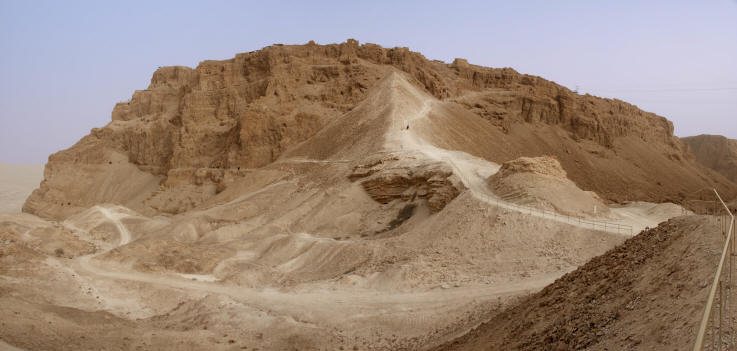
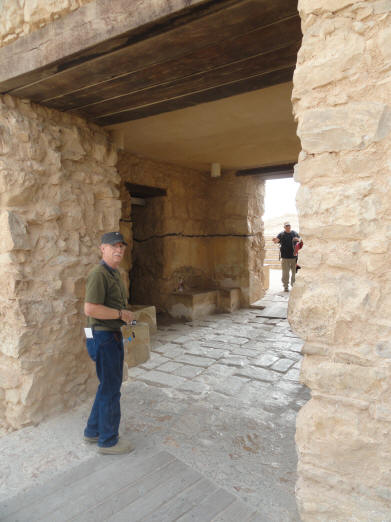
Coming down the back side of Masadda
Isaiah 62
6I have set watchmen upon thy walls, O Jerusalem, which shall never hold their peace day nor night:
ye that make mention of the LORD, keep not silence,
7And give him no rest, till he establish, and till he make Jerusalem a praise in the earth.Psalm 122:6 Pray for the peace of Jerusalem: may they prosper who love you.
Map of Masada
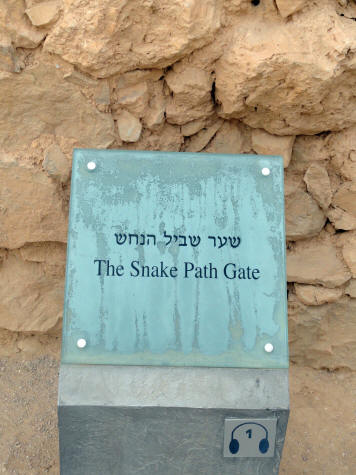
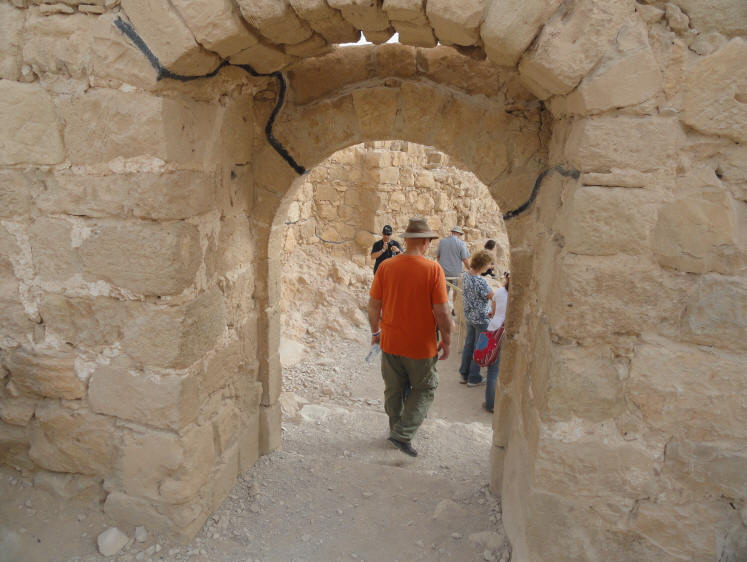
Snake Path Gate # 1
The bridge from the upper cable car station leads to the Snake Path Gate. To the right, a staircase leads to an ancient cistern and from there to the upper end of the Snake Path.
The Quarry # 2
The quarry provided the stone - hard and durable dolomite -for construction of Masada's buildings in Herod's day. The plateau of Masada consists of extensively cracked rock due to its location along the Syrian-African rift, which made quarrying easier. The quarry later served as a dry moat protecting the entrance to the northern complex. Herod's massive building program required large amounts of stone, which came from on-site quarried and from the hewing of water cisterns. Architectural elements such as column capitals were apparently brought ready-made to the site. Marks in Hebrew on these and other elements attest to the origin of the stonemasons.
The Commandant's Residence # 3
Near the quarry, to the right of the path, is a grand residence. Its location at the entrance to the northern complex indicates that it was the Commandant's Residence of Masada. The residence, consisting of a central courtyard surrounded by rooms, some of which were adorned with colorful wall paintings, later served as home to rebel families.
The Commandant's Headquarters # 4
The Commandant's Headquarters is located left of the entrance. It consists of a series of rooms decorated with wall paintings that may have served as offices to monitor the unloading of goods and scrutinize visitors arriving at the northern complex.
The Storerooms Complex # 5
The Storerooms Complex is a concentration of 29 long rooms surrounded by corridors and was built by Herod to hold food, liquids, and weapons. Josephes describes them like this: "For here had been stored a mass of corn, amply sufficient to last for years, abundance of wine and oil, besides every variety of pulse and piles of dates."
The Northern Palace # 6a, # 6b & # 6c
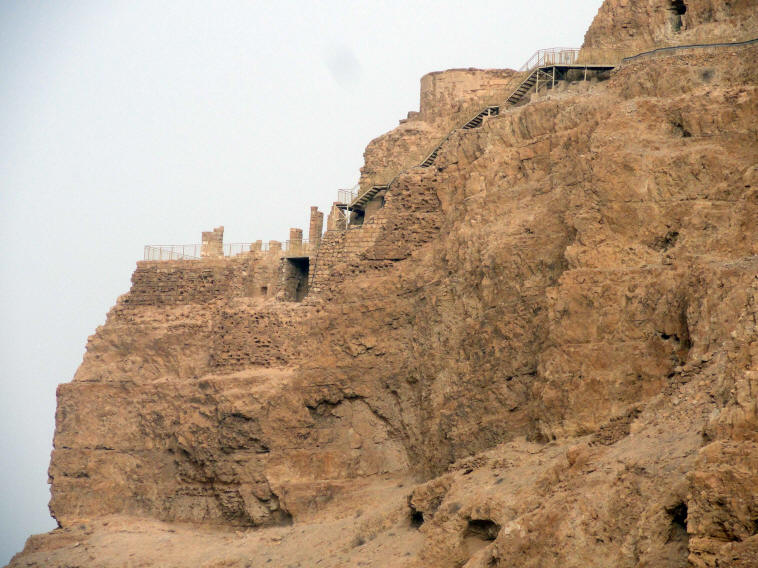
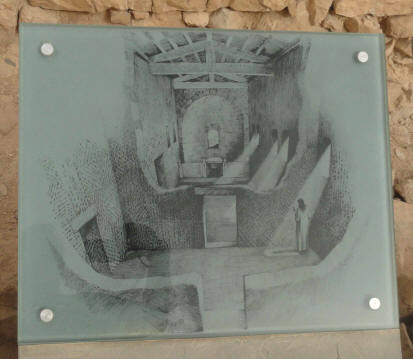
This grand and daring building constructed by Herod is Masada's architectural gem. It is 30 meters high, built on three rock terraces and supported by impressive retaining walls. Combining both Hellenistic and Roman architectural elements, the palace was built to host high-ranking visitors and to all the king his solitude. Herod and his family lived on the upper level, and the two lower levels were for receptions. The upper terrace, consisting of the king's private rooms and a lookout patio, has been preserved in its original Herodian form. From the semicircular terrace, which was once surrounded by columns, the remains of the Roman siege system and the ancient road northward can clearly be seen. In addition to the strategic advantage of the palace's location at the inaccessible northern edge of the cliff, residents could enjoy the breeze at this point. From here you can look down on the two lower levels of the palace. Descent to these levels in antiquity was via a flight of stairs west of the palace that was destroyed in an earthquake. The residential wing consisted of four rooms and a central roofed hall. Its rooms were paved with mosaics containing geometric patterns, and their walls were covered with frescoes. A model depicting the restored Northern Palace can be seen in the central hall. A black and white mosaic has been preserved in the southwestern room. A similar mosaic design can be seen in the courtyard of the large bathhouse. Parallels of this style have been found in Italy, which indicates that Herod brought the mosaic masters, like his fresco artists, from Italy. In the center of the middle terrace level of the palace was a circular hall for banquets and receptions, surrounded by columns of which only the foundations remain. The steps leading to the lower terrace of the palace are original. This level, which was also used for banquets and receptions, consisted of a chamber surrounded by columns. Pilasters, once painted and topped by Corinthian capitals, stand against the southern wall. The outer walls of this central hall were plastered and covered with stucco, and the inner walls were covered with frescos depicting imitation marble slabs and geometric paterns. East of the hall a flight of stairs descends toward a small bathhouse including a tepid room, a cold room, and a hot room. Finds here seemingly attest to the events of Masada's last night - the skeletal remains of three individuals identified with the rebels, vestiges of clothing and sandals, arrows, and numerous pieces of mail armor. Among the most chilling finds was a woman's braided hair, remarkably preserved.
Large Bath House # 7
The Large Bathhouse was significant because bathhouses were an integral part of Roman culture. Enter Masada's Roman-style bathhouse via the courtyard, which was surrounded by columns. A model of the bathhouse located in the courtyard shows its original appearance and use. Enter the dressing room (apoditerium), with its unique paved floor and fresco-adorned walls. During the revolt, benches made out of column drums were installed in this room, along with an immersion pool. Moving into the tepid room (tepidarium) you will see remarkably preserved frescoes. On the right is the cold room (fridgedarium), a tepped pool. Continue through the original arched entrance to the hot room (caldarium). This room had a double floor, known as a hypocaust. The upper floor stood on brick and stone and rose through clay pipes embedded in the walls. In one corner of the room, a portion of the floor and wall has been restored. Nearby was a bath to which hot waster was channeled. The room was originally decorated with frescoes and stucco reliefs and had a wide vaulted ceiling.
Find Spot of the "Lots" # 8
Hundreds of ostraca (inscriptions on pottery shards) were discovered here. One group contained names, among them "Ben Yair", the name of the Commander of the Sicarii. Yigael Yadin connected this group of ostraca with the lots that Josephus says were cast by the rebels on their last night. Others say the shards were connected to the administration of the rebel community.
The Water Gate # 9
The Water Gate was accessed via a path that led from the upper row of the water cisterns on Masada's northwestern slope. A channel led the water from the gate to cisterns on the mountaintop.
The Administration Building # 10
The location of the Administration Building near the storerooms demonstrates its probable us by Herod's clerks. During the revolt, a number of rebel families lived in the building, constructing a ritual bath in the corner of its central courtyard. After the conquest of Masada, soldiers of the Roman garrison lived here briefly.
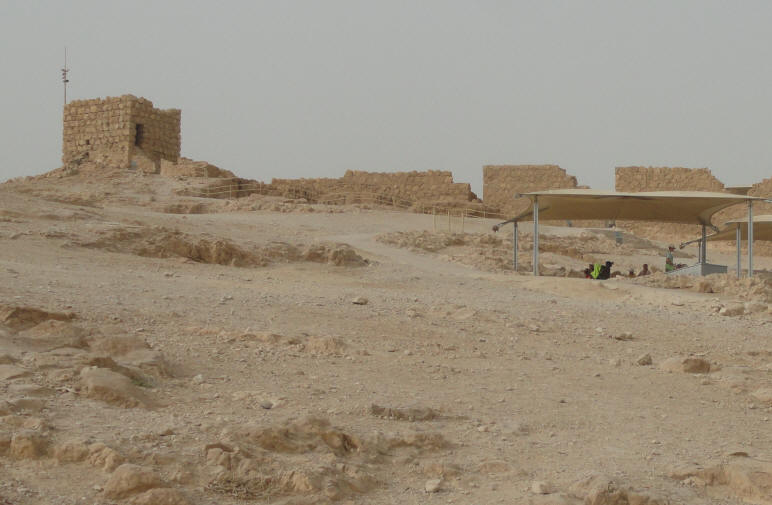
Northern Palace Observation Point # 11
The Northern Palace Observation Point contains an interactive model demonstrating Masada's water system. This point affords a view of the Northern Palace, the water system, and the paths up the mountain, as well as three Roman siege camps and the siege wall.
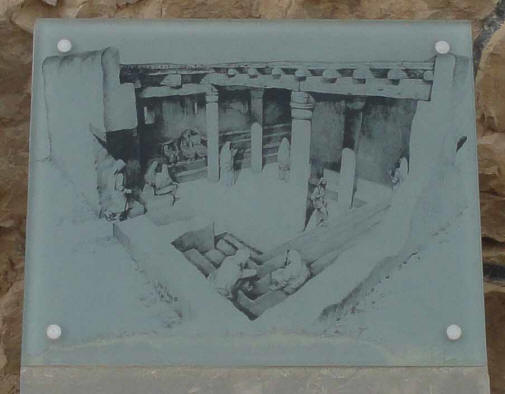
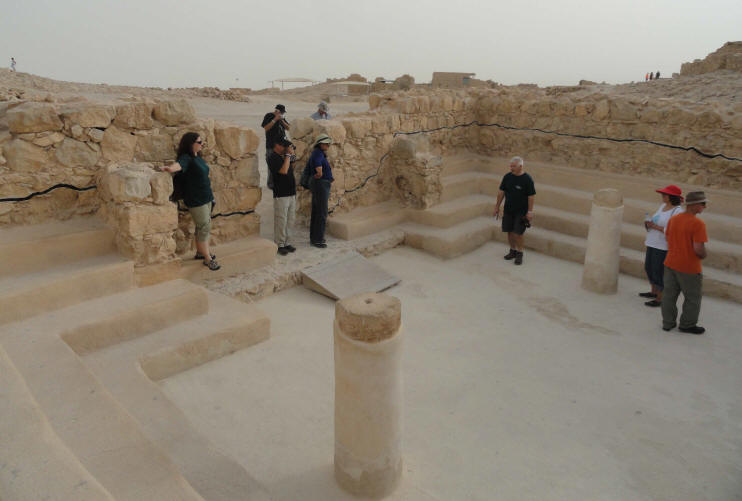
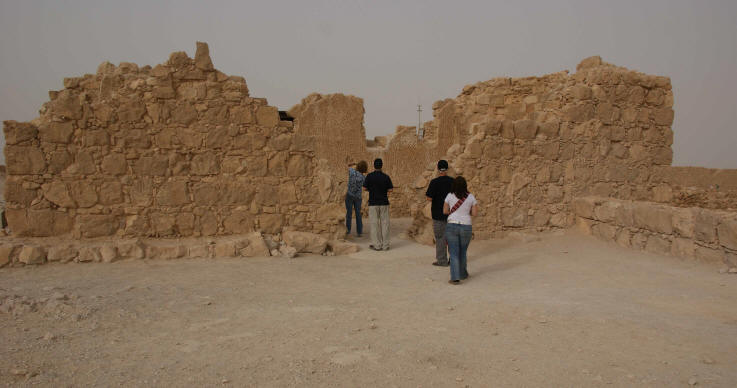
The Synagogue # 12
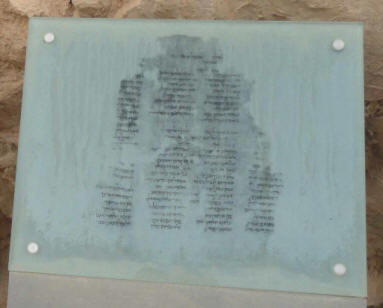
"Long since, my brave men, we determined neither to serve the Romans nor any other save God..." Josephus Flavius The rebel's way of life on Masada required a building suitable for community meetings and Torah readings. This building, which became a synagogue during the revolt, was built in Herod's time, most likely as a stable. The rebels changed its internal structure at the time of the Great Rvolt, when rows of benches lining the hall and even closed off a small room in the corner of the hall, which apparently served for storage of Torah scrolls and as a genizah (repository for damaged scrolls). Under its floor were found fragments of Biblical scrolls, including the "Vision of the Dry Bones" in the Book of Ezekiel. On the floor of the room an inscription was found that read "the priest's tithe". The synagogue at Masada is one of the very few discovered so far that date from the Second Temple period.
The "Casement of the Scrolls"
A large and rare concentration of finds from the time of the revolt was found in a corner of the room of the wall in which we stand: inscribed sheets of papyrus, fragments of scrolls, silver shekel coins, textiles, sandals and glass vessels and bone implements. Among the finds were the pay record of a Roman cavalryman in the Tenth Legion. The most interesting finds were the scroll fragments, some of which show that during the siege there were members of different sects on the mountain. The finds were gathered here by Roman soldiers collecting booty after the fall of Masada. On the floor of the room were found ballista balls and rolling stones, which came from the roof of the casemate and the nearby tower.
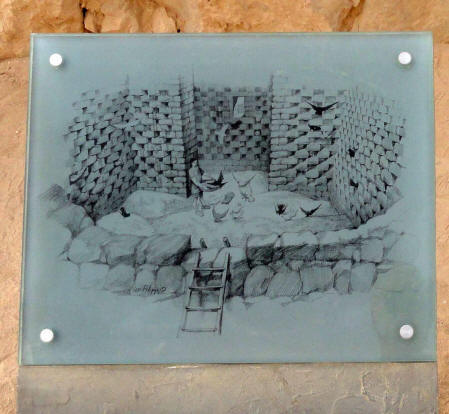
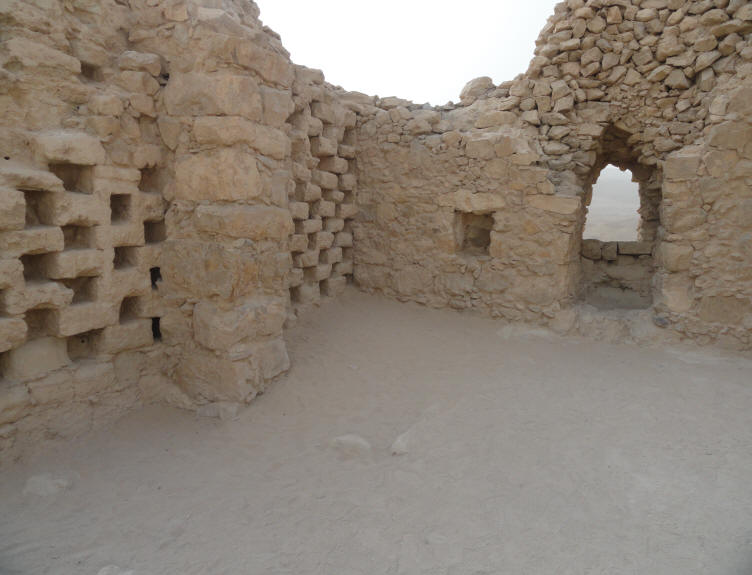
Columbarium Towers # 13a & # 13b
Why did the King raise doves on the mountain? There were three columbarium towers on Masada. The one in front of us was used as a dovecot in its ground floor and as a watchtower in its upper story. In the walls of the dovecot are several hundred niches in which the doves roosted. They supplied meat for Masada's inhabitants and guests and probably also fertilizer for agricultural crops.
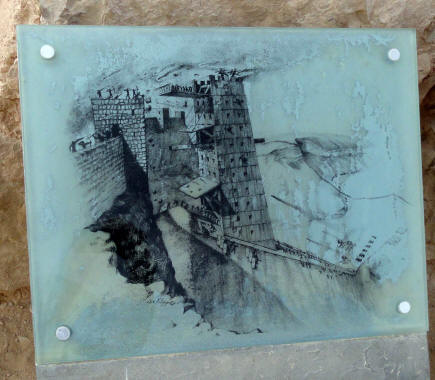
Breaching Point #14
Here the siege of Masada ended. The ramp that the Romans had built up to the summit of the mountain reached to below this point. At the top of the ramp rose the siege tower, and in it was the battering ram with which the Romans assaulted the casemate wall. However, the rebels had built a wall of earth and wood, against which the battering ram was ineffective: "Observing this, Silva, thinking it easier to destroy this wall by fire, ordered his soldiers to hurl at it showers of burning torches... At the first outbreak of the fire, a north wind which blew in the faces of the Romans caused them alarm; far diverting the flame from above, it drove it against them... Then suddenly the wind veering, as if by divine providence, to the south and blowing will full force in the opposite direction, wafted and flung the flames against the wall, which now through and through was all ablaze." Josephus Flavius When night fell, and it was clear that the situation was hopeless and that the Romans would break in at dawn, Eleazar Ben Ya'ir assembles his followers and called for mass suicide: "The Romans, expecting further opposition... were at a loss to conjecture what had happened... Here encountering the mass of the slain, instead of exulting as over enemies, they admired the nobility of their resolve and the contempt of death displayed by so many in carrying it, unwavering, into execution." Josephus Flavius The excavations here uncovered ballista balls and arrowheads, numerous slingshots and signs of burning, evidence of the battle that raged at this spot.
[From the bottom look upward toward Masada]
Byzantine Western Gate # 15
This gate of dressed stones stood at the upper end of the path that led over the ramp to the top of the mountain during the Byzantine era. It serves as an entrance (or exit) to this day.
The Tanner's Tower # 16
In the ground floor of a tower to the west of the Western Palace, an industrial installation for the tanning of skins was discovered.
The Western Palace # 17
At 3, 700 square meters, the Western Palace, built during Herod's reign, is the largest structure on Masada. It was built around a core that consisted of an open courtyard containing living quarters, guard rooms, reception rooms and a series of bathing rooms. To the right of the entrance is a model of the reconstructed palace. As you enter the palace, you will see benches covered with stucco reliefs. Crossing the long narrow courtyard, notice the water channel on its eastern side. You will pass through two vestibules with benches leading to a central well-plastered courtyard. In this courtyard you will see a model of the core of the grand palace. In this part of the palace is a room identified as a throne room because of four depressions discovered in the floor where a throne may have been placed. Ascend the flight of steps on the north side of the courtyard to view the bath complex below, with its mosaics and stucco. Nearly is a reception room with a magnificent colorful mosaic. Going down the steps, you will see a room on the left containing two bathtubs and a water cistern. Now head toward the public immersion pool.
The Public Immersion Pool # 18
This stepped pool was constructed during the days of the Great Revolt. The wide steps allowed several people to enter the bath at once. Near the steps a dressing room was discovered, containing wall niches where clothing could be placed.
Small Palace # 19
Herod built three small palaces for his guests, which were later used by the rebels. This palace, situated on the continuation of the path to the south, was apparently never completed, and residential structures were built around it during the Great Revolt.
Small Palace # 20 a & b
a. Located east of the pool, this palace had rooms surrounding a central courtyard containing a water cistern. The rebels made changes in the building to use it as living quarters, and constructed a small ritual bath. b. Located close to the continuation of the path, this palace also consisted of rooms surrounding a courtyard. Here, too, remains dating to the period of the Great Revolt were found.
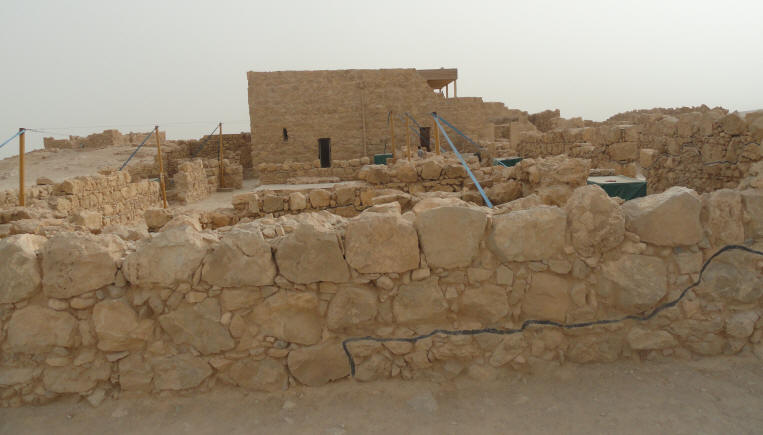
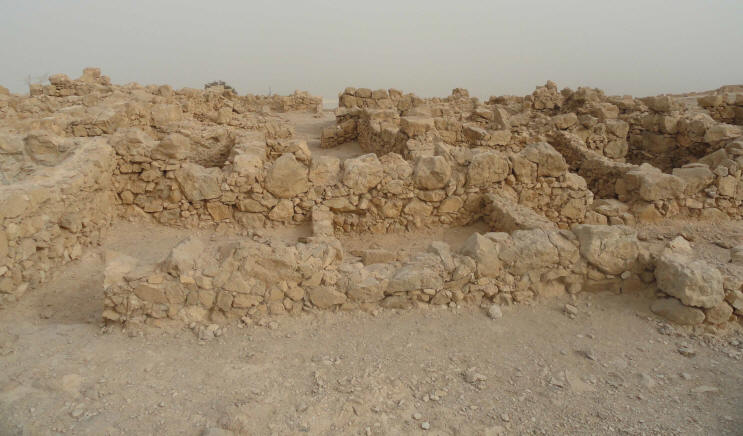
Barracks & Rebel Dwellings # 21
This large group of modest structures hugging the inner face of the perimeter wall served as living quarters during the Great Revolt. Artifacts discovered here reveal elements of daily life during the period of the revolt. Among them were textiles, tools and plaited baskets, as well as pottery and glass vessels and bone utensils. Leather items were also discovered, together with stone and metal implements and coins. Jewelry and even foodstuffs were also found. However the most outstand discoveries were written finds in Hebrew and Aramaic, which provide a rare glimpse of community life.
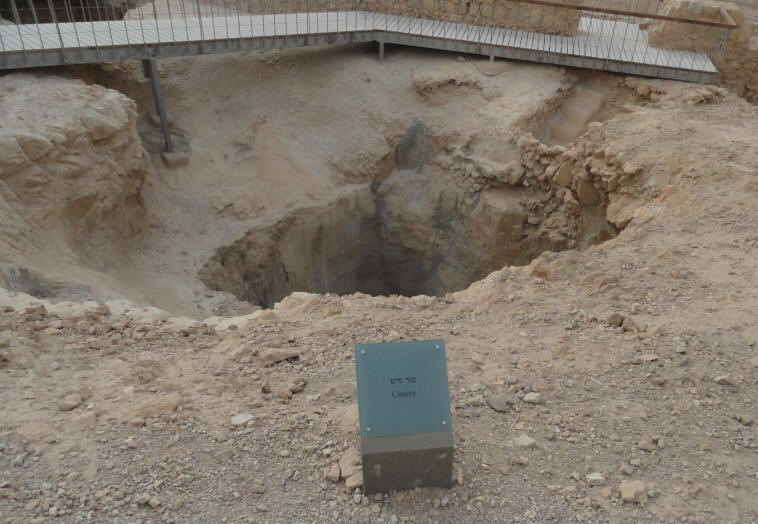
Water Cistern # 22
The water cistern drains the northern half of the plateau, and the makeup of its plaster hints that it may have been constructed as early as Hasmonean times. A plastered channel originating at the Snake Path Gate led water to this cistern. The cistern was renovated and reused by the Byzantines.
Byzantine Monastic Cave # 23
The monks would remain isolated during the week in cells or caves like this one, and on weekends they would come together for meals and prayer in the chruch.
The Byzantine Church # 24
The Byzantine empire existed for more than a thousand years, from the 4th century under Emperor Constantine to 1453. During most of its existence, it remained one of the most powerful economic, cultural and military forces in Europe. "Near the Dead Sea is a mountain called Marda (Masada). On this mountain live hermits, who have a vegetable garden six miles away, near the seashore ... Whenever the hermits wish to send out to the garden for vegetables, they harness a donkey and tell it 'Go to the garden and bring us vegetables...' And it goes down quite alone to the gardener. Every day one can see the donkey ascending and descending on its own and serving the elders" John Moschus, 600 CE Why did monks settle in the ruins of a fortress in the heart of the desert? In the desert they sought the tranquility that would bring them closer to the Creator. The cells of the monks who lived on Masada in the 5th to 7th Centuries CE were scattered all over the mountain in small building, in caves and in cisterns that had gone out of use. There they communicated with the Creator in isolation, and here, in the church, they gathered to worship together. The floor of the church were decorated with mosaics. The courtyard of the church, in which some domestic installations were found, was walled. Water was brought here from the cisterns on the slopes and from renovated cisterns on the summit.
The center of the Byzantine monastery was the church, which is well preserved. Pass through the narthex (or lobby), with its white mosaic, and continue to the nave (the central part of the church). The floor here was originally paved with mosaic and its walls were decorated with a design created from pottery shards inserted in plaster. The room's semicircular shape is preserved to its original height; glass from its window was found in the church courtyard. The floor contains a pit, which may have served as a crypt or a reliquary. It was dug in the ground beneath the altar, which was originally sectioned off by a decorated marble chancel. The church was roofed with clay tiles, which were found by the dozens during excavation. Plastered stone gutters protruded from the roof of the church and were attached to its outer walls. The western room of the church contains a mosaic depicting floral designs and medallions encircling fruit and baskets of communion bread. A low stone wall surrounded the church courtyard, where a number of farming installations were discovered.
The Watch Tower # 25
On the southern portion of the administration building, you can ascend the watch tower for an extensive view of the plateau and its surroundings. In Herod's day, the tower served as a guard's lookout. South of the tower are the "officers' quarters", a residential house built in barracks style in Herod's day to house his soldiers.
More Photos and Information From the 2011 Sukkot Trip
Day 2 - 13 Oct 2011 Day 3 - 14 Oct 2011 Day 4 - 15 Oct 2011 Day 5 - 16 Oct 2011 Day 6 - 17 Oct 2011 Day 7 - 18 Oct 2011 Day 8 - 19 Oct 2011 Day 9 - 20 Oct 2011 Day 10 - 21 Oct 2011 Day 11 - 22 Oct 2011 Day 12 - 23 Oct 2011